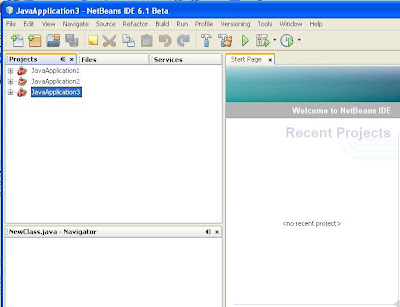
There are two API which are related to the NetBeans Projects.
1.) Project API
2.) Project UI API
We will start with the Project API first because it was here where I found my answer. In order to understand well let up simulate the "Open Projects" Action in NetBeans IDE. At the end of this tutorial we should be able to have a Global button in the toolbar to open project(similar to the Open Project(cntrl + shift + O) Action). The process will help us understand how NetBeans Projects are Opened in the Window.
- We will create a new Module called "OpenProject".
- To create a module refer to my previous post where I have explained in detail on how to create a new Module.
- In order to simulate the "Open Project" button, let us now create an Action.
- Right click the project node and select Action.
- We will make an "Alwaya Enabled" action. So click next.
- Keep the category as "File". We will just have a button in the Globar Toolbar. So check Global Toolbar Button and keep the category as Edit(Edit because we don't want to create a misunderstanding by keeping it in File category as there already exists the Open Project button in the File toolbar). Click Next.
- Give class name as "MyOpenProject", action name as "MyOpenProject" and a url to a 16X16 gif/png icon file.
 Click Finish.
 - A class called "MyOpenAction" will be automatically generated and the action will be registered in the XML layer.
- Since we will be using the Project API dependency, we need to add it to the module dependency library. To do so
- Right Click the project node.
- Go to properties
- Go to Libraries
- Select Add. One after the other add the following dependencies
- Project API
- Project UI API
- File System API
- The dependencies should look as follows.
- Now we are set to write the performAction function. It will look like this.
- public void performAction() {
try {
JFileChooser projectChooser = new JFileChooser();
projectChooser.setFileSelectionMode(JFileChooser.DIRECTORIES_ONLY);
projectChooser.showOpenDialog(null);
File projectToBeOpenedFile = projectChooser.getSelectedFile(); FileObject projectToBeOpened = FileUtil.toFileObject(projectToBeOpenedFile);
Project project = ProjectManager.getDefault().findProject(projectToBeOpened);
Project[] array = new Project[1];
array[0] = project;
OpenProjects.getDefault().open(array, false);
} catch (IOException ex) {
Exceptions.printStackTrace(ex);
}
} - Let us go through the code quickly.
- JFileChooser projectChooser = new JFileChooser(); projectChooser.setFileSelectionMode(JFileChooser.DIRECTORIES_ONLY); projectChooser.showOpenDialog(null);
- This part of the code is a nomal JFileChosser where we restrict our selection to directories only.
- File projectToBeOpenedFile = projectChooser.getSelectedFile(); FileObject projectToBeOpened = FileUtil.toFileObject(projectToBeOpenedFile); The projectChooser now returns the java.io.File object of the selected project. This object is then converted to the NetBeans FileSystem by using the FileUtil class of the FileSystem API. This conversion returns a FileObject which the NetBeans equivalent of a file representation.
- Now comes the crucial part of the code. Project project = ProjectManager.getDefault().findProject(projectToBeOpened); Project[] array = new Project[1]; array[0] = project; OpenProjects.getDefault().open(array, false);
- We use the default instance of the ProjectManager class and use its findProject(org.openide.filesystems.fileobject) to find the project folder. This method returns a org.netbeans.api.project.Project. NetBeans uses this as an identifier for all of its projects. Now that we have the Project handle with us, we need to open it inside the NetBeans window. We can do this using the OpenProjects class(which belongs to the Project UI API). We get its default instance and use its open(Project[] projects,boolean openSubprojects) to open the project folder. But we notice here that the first argument takes an array of Project. So we create a Project array called array of size 1. We assign array[0] = project and pass array as the first parameter. The boolean value here asks if the user want to wants to open subprojects or not. We pass false here. So only the main project will be opened.
- Now Run the module. You will be able to see your custom icon displaying "MyOpenProject".
- Click it and a File Chooser Will appear.
- Select a project to open.
- The project appears in the Project window.


1 comment:
Post a Comment